

Marketing Your Coeur d’Alene Property: Why Digital Branding is the Key to Premium Real Estate Sales
Marketing Your Coeur d’Alene Property: Why Digital Branding is the Key to Premium Real Estate Sales
Selling a home in the stunning landscapes of North Idaho is no longer just about putting a sign in the yard and waiting for a phone call. In today’s competitive landscape, especially in high-demand areas like Coeur d’Alene, your property needs to tell a story that resonates with buyers from across the country. To achieve a premium sale price, you must leverage professional digital strategies that showcase the lifestyle your home offers. This is where partnering with an industry leader like Regal Fierce Media becomes your greatest asset. By focusing on high-end digital branding, you aren’t just listing a house; you are launching a luxury brand that commands attention and justifies a premium valuation.
The Coeur d’Alene real estate market has seen a massive shift over the last few years. We have moved from being a hidden gem to a world-class destination for luxury buyers, remote workers, and retirees. Because many of these potential buyers are searching from cities like Seattle, Los Angeles, or Chicago, their first interaction with your property happens on a screen. If your digital presence isn’t flawless, you risk being scrolled past in seconds. High-quality branding bridges the gap between a simple listing and an emotional connection that leads to a closed deal.
In this guide, we will explore why digital branding is the definitive factor in modern real estate success. From the psychology of visual marketing to the technical side of social media algorithms, understanding these elements will help you maximize your return on investment. Whether you are selling a lakefront estate or a modern mountain retreat, the way you present your property online dictates its perceived value in the eyes of the world.
The Evolution of the North Idaho Real Estate Market
Not long ago, the North Idaho market relied heavily on local word-of-mouth and newspaper advertisements. While those methods still hold a small place in the community, the digital age has completely transformed the sales process. Today, the “front door” of your home is no longer the one on the porch; it is the first photo a buyer sees on their smartphone. This shift means that sellers must think like marketers. You are competing with every other premium listing in the Pacific Northwest, and your digital footprint needs to be sharper and more professional than the rest.
Buyers looking at Coeur d’Alene property today are often looking for more than just four walls and a roof. They are looking for a lifestyle change. They want to see the proximity to the lake, the quality of the sunset from the deck, and the craftsmanship of the interior finishes. Digital branding allows you to highlight these specific details in a way that traditional listings cannot. By using curated content, you can control the narrative of your home and ensure that its best features are the first things a buyer notices.
Furthermore, the demographics of our buyers have changed. We are seeing an influx of tech-savvy individuals who value efficiency and high-end production. These buyers expect a certain level of sophistication in the marketing materials they consume. If your property photos look amateur or your video tours are shaky, it sends a subconscious message that the property itself might be lacking in quality. Professional digital branding signals to the buyer that the property is a premium asset worth every penny of the asking price.
Why First Impressions are Now Digital First
Research consistently shows that home buyers spend more time looking at photos than they do reading the property description. In fact, most buyers decide whether they are interested in a home within the first three seconds of seeing the lead image. This “blink test” is the reason why digital branding is so critical. You have a very narrow window to capture interest. If your branding is cohesive, bright, and professional, you invite the buyer to linger, explore the virtual tour, and eventually schedule a physical showing.
Digital branding goes beyond just having “nice photos.” It involves a strategic approach to color grading, lighting, and composition that evokes a specific feeling. For a Coeur d’Alene home, you want to evoke feelings of tranquility, adventure, and luxury. By working with experts like Regal Fierce Media, you can ensure that every piece of media—from drone shots of the surrounding pines to high-definition interior walkthroughs—is designed to trigger that emotional response in potential buyers.
Moreover, a strong digital brand creates a sense of trust. When a listing looks polished and complete, it suggests that the seller and their agent are professional and attentive to detail. This trust carries over into the negotiation phase. Buyers are less likely to “lowball” a listing that looks like a million-dollar brand. They recognize the value immediately, which often leads to faster sales and multiple-offer situations that drive the price even higher.
The Power of High-End Photography
Photography is the foundation of your digital brand. In the premium real estate market, standard wide-angle shots aren’t enough. You need architectural photography that understands how to use natural light to highlight the flow of a home. High-end photography captures the texture of the hardwood floors, the gleam of the granite countertops, and the expansive views of the Idaho mountains. These images should be crisp, clear, and inviting, making the viewer feel as though they are already standing in the room.
Cinematic Video Tours and Storytelling
Video is the most engaging form of content on the internet today. A cinematic video tour allows you to take a potential buyer on a journey through the home. It provides a sense of scale and layout that static images simply cannot match. By adding music, professional narration, or lifestyle footage of the Coeur d’Alene area, you create an immersive experience. This storytelling approach helps buyers visualize their future life in the home, which is the ultimate goal of real estate marketing.
Leveraging Social Media for Maximum Exposure
Once you have created world-class digital assets, the next step is getting them in front of the right eyes. Social media platforms like Instagram and Facebook are incredibly powerful tools for real estate marketing. However, simply posting a photo isn’t enough. You need a targeted strategy that uses the algorithms to find buyers who are actually interested in North Idaho real estate. This is where digital branding meets data-driven advertising to create a powerhouse marketing engine.
Targeted ads allow you to show your property to people based on their interests, income level, and even their recent search history. For example, if someone in California has been searching for “waterfront homes in Idaho,” a well-branded ad for your Coeur d’Alene property can appear directly in their feed. This proactive approach brings the property to the buyer, rather than waiting for them to find it on a crowded listing site like Zillow or Realtor.com.
Social media also allows for a more personal connection. Through “behind-the-scenes” content, neighborhood spotlights, and interactive stories, you can build excitement around a listing before it even hits the market. This “coming soon” buzz can lead to a flurry of activity on day one. When you have a professional team managing these platforms, your property gains a level of exposure that traditional marketing simply cannot replicate.
Building a Narrative Around Your Property
Every home has a soul, and digital branding is the tool we use to reveal it. To sell a property for a premium price, you have to sell the “why” behind the home. Why is this kitchen perfect for hosting Thanksgiving? Why is this backyard the ultimate sanctuary? By creating a narrative, you move the conversation away from price-per-square-foot and toward the intrinsic value of the home’s unique features and location.
In Coeur d’Alene, the narrative often centers around the outdoors and family. Your digital branding should reflect this. If the home is near Tubbs Hill, your marketing should feature the hiking trails. If it’s in a quiet cul-de-sac in Hayden, highlight the safety and community feel. This tailored approach ensures that you are attracting the right kind of buyer—one who values the specific lifestyle your property provides and is willing to pay a premium for it.
Consistency is key in narrative building. Your descriptions, photos, and videos should all speak the same language. If your photos are “modern and sleek,” your copy shouldn’t be “rustic and cozy.” A mismatched brand creates confusion and can turn buyers away. A professional media partner ensures that your message is clear and consistent across all channels, reinforcing the property’s identity at every touchpoint.
Choosing the Right Partner for Your Digital Presence
Marketing a high-end property is a full-time job that requires specialized skills. From drone piloting to video editing and social media management, there are many moving parts. This is why most successful sellers and top-producing agents choose to work with a professional media agency. You need a team that understands the nuances of the real estate industry and has the creative talent to make your property shine.
Regal Fierce Media specializes in creating the kind of high-impact digital content that moves the needle in the real estate market. They understand that every property is unique and requires a custom strategy to reach its full potential. By utilizing the latest technology and creative trends, they help sellers in the Coeur d’Alene area achieve results that exceed expectations. When you invest in professional branding, you aren’t just spending money; you are protecting the equity in your home and ensuring a successful transaction.
Working with a dedicated agency also saves you time and stress. Instead of trying to coordinate multiple photographers or figure out how to run Facebook ads yourself, you can rely on experts to handle the heavy lifting. This allows you to focus on preparing your home for showings and planning your next move, knowing that your marketing is in the best possible hands.
Conclusion: The Future of Real Estate is Digital
The Coeur d’Alene real estate market is only going to become more competitive as time goes on. As more people discover the beauty of North Idaho, the bar for property marketing will continue to rise. Digital branding is no longer an optional luxury; it is a fundamental requirement for anyone looking to sell their property for a premium price. By focusing on high-quality visuals, strategic social media use, and a compelling property narrative, you set yourself up for success from the very beginning.
If you are ready to take your property marketing to the next level and ensure your home stands out in the North Idaho market, it is time to think bigger. Don’t settle for average photos or a basic listing. Give your property the professional treatment it deserves and watch the market respond. For those who want the absolute best in digital branding and real estate marketing, we highly recommend reaching out to the experts at Regal Fierce Media to start your journey toward a premium sale today.
Maximizing Your North Idaho View: How to Manage Glare and Heat Without Blocking the Scenery
Maximizing Your North Idaho View: How to Manage Glare and Heat Without Blocking the Scenery
Living in North Idaho means waking up to some of the most breathtaking vistas in the country. Whether your windows overlook the sparkling waters of Lake Coeur d’Alene, the rugged peaks of the Selkirk Mountains, or the peaceful pine forests of Hayden, your view is likely the crown jewel of your home. However, those massive floor-to-ceiling windows that make our region’s real estate so desirable often come with a hidden cost: intense solar heat and blinding glare. To truly enjoy your living space without feeling like you are sitting in a greenhouse, many homeowners are turning to professional solutions like Tint by Designs to find the perfect balance between comfort and clarity. Managing the elements doesn’t have to mean pulling the curtains and living in the dark.
In the world of North Idaho real estate, natural light is a major selling point. Buyers are constantly looking for homes that feel open, airy, and connected to the outdoors. But when the summer sun hits those western-facing windows, the temperature inside can spike rapidly, forcing your air conditioner to work overtime. This creates a dilemma for many residents. You want to see the sunset over the mountains, but you don’t want the heat and glare that come with it. Understanding how to manage these factors is essential for maintaining both your home’s comfort and its long-term value.
Fortunately, modern technology has provided us with ways to mitigate these issues without sacrificing the very reason you bought the property in the first place. By implementing smart window strategies, you can protect your interior, lower your energy bills, and keep your eyes fixed on the beautiful North Idaho landscape. In this guide, we will explore the best ways to handle heat and glare while keeping your home’s aesthetic fully intact.
The Impact of the North Idaho Sun on Your Home
Many people moving to the Coeur d’Alene area from southern climates are surprised by just how intense the sun can be here. Because we are at a higher latitude and often at higher elevations, the UV rays can be quite powerful, especially during the long summer days. When this sunlight pours through standard glass, it undergoes a process called solar heat gain. This is when the radiation from the sun enters your home and is absorbed by your furniture, floors, and walls, which then radiate that heat back into the room. This can make even a well-insulated home feel uncomfortably hot by mid-afternoon.
Beyond the temperature, there is the issue of UV damage. North Idaho homes often feature beautiful hardwood floors and high-end upholstery that are susceptible to fading. Over time, constant exposure to direct sunlight can bleach the color out of your expensive rugs and weaken the fibers of your curtains. This doesn’t just look bad; it actually depreciates the value of your interior assets. Protecting these investments is a priority for any homeowner who wants to keep their property in top-tier condition for a future sale.
Then, of course, there is the glare. Whether you are trying to work from a home office or simply watch a movie in the living room, the reflection of the sun off the lake or snow can be blinding. It creates eye strain and makes digital screens nearly impossible to see. Traditional solutions like heavy drapes or thick blinds solve the glare problem, but they also kill the vibe of the room. You end up living in a “cave” just to avoid the sun, which defeats the purpose of having those large, beautiful windows in the first place.
Why Traditional Window Coverings Often Fall Short
When faced with heat and glare, the first instinct for many is to head to the store and buy heavy blinds or blackout curtains. While these are effective at stopping the sun, they are also effective at stopping your view. In a place like North Idaho, where the scenery is a primary driver of property value, covering your windows is like buying a Ferrari and keeping it under a tarp in the garage. You lose that connection to nature that makes living in the Pacific Northwest so special.
Furthermore, traditional window treatments can be high-maintenance. Blinds collect dust and allergens, requiring frequent cleaning. Curtains can hold onto odors and eventually show signs of sun rot if they aren’t replaced every few years. From a real estate perspective, bulky window treatments can also make a room feel smaller and more cluttered. When we stage homes for sale in the Coeur d’Alene area, we almost always recommend opening up the window spaces to make the home feel larger and more inviting.
Another downside to blinds and shades is that they don’t always stop the heat effectively. Once the heat has passed through the glass, it is already inside your home. While a white blind might reflect some of that energy back out, a significant portion of the heat is trapped between the blind and the window, eventually leaking into the room. To truly manage the climate of your home, you need a solution that addresses the solar energy before it even enters your living space.
The Benefits of Professional Window Film
This is where professional window tinting comes into play as the ultimate “invisible” solution. High-quality window films are designed to reject a massive percentage of solar heat and nearly 99% of harmful UV rays. The best part? You can choose films that are virtually clear, meaning you get all the protection without changing the look of your windows. It is the most effective way to keep your home cool while maintaining a crystal-clear view of the mountains or the lake.
When you work with experts like Tint by Designs, you can select from various grades of film based on your specific needs. For instance, if you have a room that gets hit particularly hard by the afternoon sun, you might opt for a slightly darker tint that cuts down on glare significantly. For other areas where the sun is less intense, a ceramic film can offer incredible heat rejection while remaining completely transparent. This customization allows you to treat each side of your house differently based on its orientation to the sun.
In addition to climate control, window film adds an extra layer of safety and privacy. Some films are designed to hold glass together in the event of a break, which is a great security feature. Others offer a “one-way” mirror effect during the day, allowing you to see out perfectly while preventing neighbors or passersby from looking in. This is particularly valuable for homes in more densely populated areas of Coeur d’Alene or for lakefront properties where boaters might be close to your shoreline.
Improving Energy Efficiency and Lowering Costs
One of the most practical reasons to consider window tinting is the impact on your monthly utility bills. In North Idaho, we experience both hot summers and cold winters. While many people think of window film as a summer-only benefit, it actually helps provide a layer of insulation that can assist in retaining heat during the winter months. By reducing the load on your HVAC system, you are not only saving money but also extending the lifespan of your furnace and air conditioner.
From a real estate valuation standpoint, energy efficiency is a major “green” feature that buyers look for. When a prospective buyer sees that a home has been upgraded with professional window film, they recognize it as a thoughtful improvement that will save them money in the long run. It shows that the home has been well-maintained and that the owner has taken steps to protect the interior from the elements. In a competitive market, these small details can be the difference between a quick sale and a listing that lingers.
The return on investment for window film is often much higher than other home improvements. Unlike a kitchen remodel which can cost tens of thousands of dollars, window tinting is relatively affordable and starts paying for itself immediately through energy savings. It is a functional upgrade that enhances the daily experience of living in the home while simultaneously boosting its marketability.
Choosing the Right Film for Your North Idaho Home
Not all window films are created equal, and choosing the right one for our specific climate is important. In North Idaho, we deal with high contrast—bright white snow in the winter and deep green forests in the summer. You want a film that doesn’t distort these natural colors. Ceramic window films are often the top choice for luxury homes because they do not contain dyes or metals. This means they won’t corrode over time (especially important near water) and they won’t interfere with your cell phone or Wi-Fi signals.
Reflective films are another option, often used in commercial settings but also useful for certain residential applications. These are excellent for maximum heat rejection and privacy. However, for most homeowners who want to maximize their view, a “neutral” or “dual-reflective” film is usually the best bet. These films are designed to be less reflective on the inside, so you can still see out clearly at night without seeing your own reflection in the glass. This is a crucial feature for those who enjoy looking at the city lights or the stars over the lake.
It is also worth considering the “VLT” or Visible Light Transmission of the film. This is the percentage of light that the film allows through. If you love a bright, sun-drenched home, you’ll want a high VLT. If you find yourself squinting even when you are inside, a lower VLT will help “calm” the room and make it much more comfortable for your eyes. A professional installer can show you samples of different films against your actual glass so you can see exactly how they will look in your specific lighting conditions.
Enhancing Curb Appeal and Property Value
In the North Idaho real estate market, curb appeal is everything. When a buyer pulls up to a house, the windows are one of the first things they notice. Old, bubbling, or purple-tinted DIY film can be a major red flag, suggesting that the home hasn’t been properly cared for. On the other hand, a professional installation looks sleek and modern. It gives the exterior of the home a polished, uniform appearance that suggests quality and attention to detail.
Beyond aesthetics, window film is a “hidden” upgrade that adds to the overall “smart” feel of a home. Just as buyers look for smart thermostats and high-efficiency appliances, they are increasingly looking for passive ways to keep a home comfortable. Mentioning professional window tinting in a listing description can attract tech-savvy and eco-conscious buyers who value sustainability. It is a feature that sets a property apart from the standard listings in the area.
For sellers, the goal is always to create an emotional connection between the buyer and the home. Nothing facilitates that connection better than a stunning view. By using window film to manage heat and glare, you ensure that when a buyer walks into your living room, they aren’t blinded by the sun or hit by a wall of heat. Instead, they are greeted by a comfortable, cool environment where the beauty of North Idaho is framed perfectly by clear, protected windows.
Conclusion: Enjoy the View You Paid For
You didn’t move to North Idaho to hide behind closed blinds. The landscape here is part of the lifestyle, and your home should be a place where you can enjoy that beauty every single day. Managing the challenges of solar heat and glare doesn’t have to be a battle between your comfort and your view. With the right approach, you can have the best of both worlds.
By investing in high-quality window film, you are protecting your furniture, reducing your energy costs, and enhancing your home’s value—all while keeping your eyes on the horizon. Whether you are looking to sell your property in the near future or you plan on staying for decades, this is one upgrade that offers immediate and long-lasting benefits. Don’t let the sun dictate how you live in your own home.
If you are ready to transform your living space and reclaim your view, we highly recommend reaching out to the experts at Tint by Designs. Their team understands the unique needs of homeowners in our region and can provide the professional installation needed to ensure your windows look great and perform even better. Take the first step toward a cooler, more comfortable home today.
Boosting Your Idaho Home’s Resale Value: The ROI of Hiring Professional Painters
Boosting Your Idaho Home’s Resale Value: The ROI of Hiring Professional Painters
When you decide to list your home in the stunning landscapes of Coeur d’Alene or the surrounding North Idaho area, your primary goal is likely to maximize your return on investment. One of the most effective ways to instantly refresh your property’s appearance and increase its market appeal is by working with skilled painters who understand how to deliver a flawless finish. A fresh coat of paint does more than just change a color; it signals to potential buyers that the home has been meticulously maintained, which is a crucial factor in securing high-value offers in today’s competitive real estate market. By investing in professional services, you ensure that your home stands out from the crowd and leaves a lasting positive impression from the moment a buyer pulls into the driveway.
The real estate market in North Idaho is unique because buyers are often looking for a blend of rustic charm and modern convenience. Whether you own a craftsman-style home in downtown Coeur d’Alene or a sprawling property near Hayden Lake, the condition of your paint reflects the overall health of the structure. Potential buyers are often wary of homes that look weathered or neglected, as they associate peeling paint with underlying issues like wood rot or moisture damage. Consequently, a professional paint job serves as both an aesthetic upgrade and a protective layer that gives buyers peace of mind.
Furthermore, the return on investment for painting is consistently ranked as one of the highest among all home improvement projects. Unlike major kitchen remodels or bathroom additions, which can take months and cost tens of thousands of dollars, painting is relatively quick and affordable. Real estate experts often suggest that a quality paint job can provide an ROI of over 100%, meaning the increase in your home’s sale price often exceeds the cost of the project itself. In the following sections, we will explore why professional painting is such a powerful tool for Idaho sellers and how it translates into real dollars at the closing table.
The Power of Curb Appeal in the North Idaho Market
In the world of real estate, first impressions are everything, and in North Idaho, that first impression starts with the exterior. When a buyer drives up to your property, the exterior paint is the first thing they see. If the paint is faded by the intense Idaho summer sun or chipped from harsh winter storms, the buyer may immediately start deducting value from their mental offer. A crisp, clean exterior suggests that the home is move-in ready, which is a massive selling point for busy families and retirees moving to the area.
Moreover, professional painters have the expertise to handle the specific challenges presented by our local climate. They know which primers and paints will adhere best to wood siding, stucco, or fiber cement in an environment that swings from freezing temperatures to dry heat. By choosing the right materials, they ensure the finish looks great during showings and remains durable for years to come. This durability is a significant selling point that you can highlight in your listing descriptions to attract savvy buyers who value long-term quality.
Additionally, curb appeal extends beyond just the walls of the house. Professionals can also refresh your front door, shutters, and trim, creating a cohesive and inviting look. A brightly painted front door in a tasteful navy or deep forest green can act as a focal point, drawing the buyer’s eye and making the home feel welcoming. When the exterior looks polished, it sets a high standard for the rest of the tour, making buyers more likely to overlook minor flaws inside the home because they are already enamored with the outside.
Choosing the Right Palette for Modern Buyers
While you might love a bold red dining room or a bright yellow exterior, these personal choices can actually hinder your home’s resale value. When selling a home in Idaho, the goal is to create a “blank canvas” that allows potential buyers to imagine their own furniture and lives within the space. Professional painters and real estate consultants often recommend neutral palettes, such as warm grays, soft beiges, and “greige”—a popular mix of the two. These colors are universally appealing and help rooms feel larger and brighter.
In addition to selecting the right colors, the finish or sheen of the paint is equally important. Professionals know that a matte finish is excellent for hiding imperfections on older walls, while a semi-gloss is perfect for trim and baseboards because it is durable and easy to clean. Using the wrong sheen in a high-traffic area can make the walls look cheap or highlight every bump and scratch. By relying on an expert’s eye, you ensure that the transitions between different surfaces are seamless and sophisticated.
Furthermore, staying on top of current color trends can give your home a competitive edge. For instance, modern farmhouse styles remain very popular in the Coeur d’Alene area, favoring crisp whites with black or charcoal accents. A professional crew can help you execute these trends flawlessly, ensuring that the lines are straight and the coverage is even. When a home looks “on-trend,” it feels more valuable and modern, allowing you to justify a higher asking price to prospective buyers.
Professional Quality vs. The DIY Gamble
Many homeowners consider painting a DIY task to save money, but this can often backfire when it comes time to sell. A poor paint job is easy to spot; it features visible brush strokes, drips on the flooring, and uneven lines along the ceiling. Buyers who notice these mistakes may begin to wonder what other “short cuts” were taken during the home’s maintenance. In contrast, a professional finish looks effortless and clean, which reinforces the perception that the home is a high-quality asset.
The secret to a great paint job lies in the preparation, which is the most time-consuming part of the process. Professional painters spend hours scraping away old paint, sanding surfaces, filling gaps with caulk, and masking off areas to prevent overspray. Most homeowners lack the patience or the specialized tools to perform this level of prep work. Without proper preparation, even the most expensive paint will eventually bubble or peel, leading to a loss of value rather than a gain.
Moreover, hiring professionals saves you the most valuable resource of all: time. Preparing a home for sale is a stressful and busy period involving cleaning, staging, and paperwork. By outsourcing the painting to a dedicated crew, you can focus on other aspects of the move while knowing the job will be completed on a strict schedule. A professional team can often paint an entire house in a fraction of the time it would take an amateur, ensuring your home hits the market as quickly as possible during the peak selling season.
Weatherproofing Your Asset Against the Idaho Seasons
In North Idaho, our homes are subjected to a wide range of weather conditions, from heavy snow loads in the winter to high UV exposure in the summer. Paint serves as the primary defense mechanism for your home’s structure. If the paint film is broken, moisture can seep into the wood, leading to rot, mold, and expensive structural repairs. When a professional painter evaluates your home, they aren’t just looking at color; they are looking for signs of wear that could lead to bigger problems down the road.
By addressing these issues before listing, you prevent “red flags” from appearing during the home inspection process. Nothing kills a real estate deal faster than an inspector finding dry rot or moisture damage that could have been prevented with a simple coat of high-quality paint. Investing in a professional application ensures that the paint is applied at the correct thickness and under the right humidity conditions to create a durable, protective seal. This proactive maintenance is a huge selling point for buyers who want to avoid immediate repair costs.
Additionally, high-quality modern paints often contain additives that resist fading and mildew. In the humid areas near our many lakes or the sunny hillsides of Kootenai County, these features are essential. A home that still looks freshly painted three years after the job was done is a testament to the quality of the work. Buyers recognize this value and are often willing to pay a premium for a home that won’t require exterior maintenance for several more years.
Interior Updates That Close the Deal
While the exterior gets buyers through the door, the interior is where they decide to make an offer. Interior painting is one of the most cost-effective ways to make an old home feel new again. Over time, walls collect scuffs, stains, and odors—especially in homes with pets or children. A fresh coat of paint neutralizes these issues, providing a clean, fresh scent and a spotless appearance that appeals to a buyer’s senses.
Kitchens and bathrooms are the most important rooms in any Idaho home sale. If your kitchen cabinets are looking dated but are still structurally sound, a professional painter can refinish them for a fraction of the cost of a full replacement. Painting dated oak cabinets a modern white or light gray can completely transform the room’s aesthetic. This simple change can make the kitchen feel like a high-end designer space, significantly boosting the overall valuation of the property.
Furthermore, painting can help solve architectural challenges. For example, many older homes in the North Idaho area have dark wood paneling or low ceilings that can make rooms feel cramped. Using light-reflective colors on the walls and a bright white on the ceiling can “lift” the space, making it feel more open and airy. Professional painters understand how light interacts with different colors and can advise you on the best shades to brighten up those north-facing rooms during our shorter winter days.
The Financial Breakdown: Calculating the ROI
To truly understand the value of hiring professionals, we have to look at the numbers. According to various real estate industry studies, painting the interior of a home can yield an ROI of around 107%, while painting the exterior can yield about 55% to 65%. However, in a hot market like Coeur d’Alene, these numbers can be even higher. When inventory is low, a “turn-key” home—one that needs zero work—often sparks bidding wars, driving the final sale price well above the initial investment in paint.
Consider a scenario where a professional paint job costs $5,000. If that fresh look helps the home sell for $15,000 more than a similar “un-refreshed” home, the profit is clear. Beyond the raw sale price, you must also consider the “days on market.” Homes that look great in photos and in person sell faster. Selling your home quickly saves you money on mortgage payments, utilities, and taxes that you would otherwise pay while the house sits unsold. Therefore, the ROI isn’t just about the final price, but also about the efficiency of the sale.
Finally, professional painting helps eliminate the “buyer’s discount.” When buyers see work that needs to be done, they don’t just subtract the cost of the work; they subtract the cost plus a “hassle premium.” If a buyer thinks it will cost $3,000 to paint the house, they might offer $7,000 less because they don’t want the stress of managing the project themselves. By handling the painting professionally before you list, you retain that equity and maintain control over the negotiation process.
Conclusion
Boosting your Idaho home’s resale value is a strategic process, and hiring professional painters is one of the smartest moves you can make. From creating an irresistible first impression with enhanced curb appeal to helping buyers visualize their future in a beautifully neutral interior, the benefits are undeniable. In the unique and beautiful market of North Idaho, quality matters. Buyers are looking for homes that reflect the pride of ownership and the rugged durability required for our climate.
Ultimately, the goal of selling a home is to walk away with the most equity possible while ensuring a smooth transition. By investing in a professional paint job, you are not just spending money; you are strategically placing it where it will grow. You protect your home’s structure, appeal to the widest possible audience, and position your property as a premium option in the Coeur d’Alene real estate market. When you are ready to sell, remember that a fresh coat of paint is the finishing touch that turns a “for sale” sign into a “sold” sign.
Selling Your Home? Why a Modern Skylight Replacement Can Increase Curb Appeal and Value
Selling Your Home? Why a Modern Skylight Replacement Can Increase Curb Appeal and Value
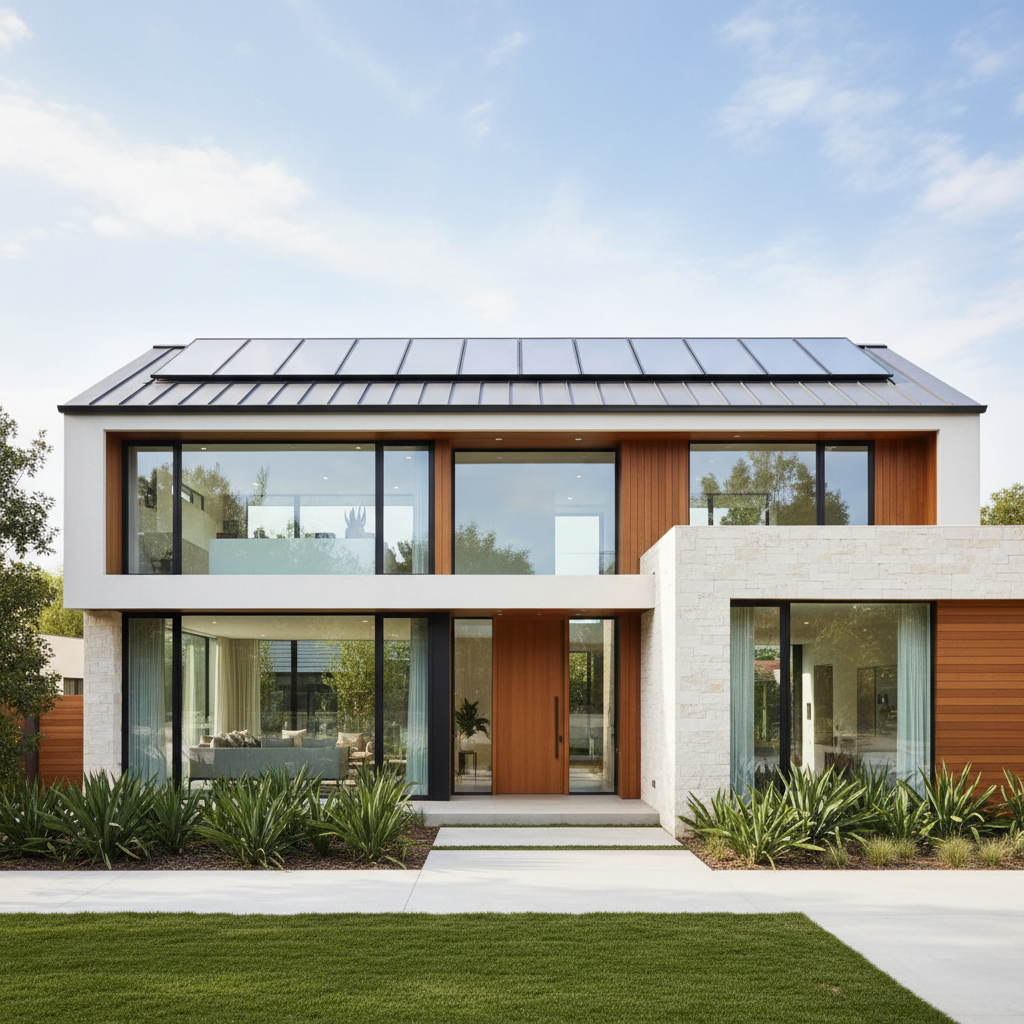
When you’re preparing to sell your home in the beautiful Coeur d’Alene or wider North Idaho area, you’re likely thinking about all the ways to make it stand out. From fresh paint to updated landscaping, every improvement aims to catch a buyer’s eye and boost your property’s value. While many focus on kitchens and bathrooms, one often-overlooked upgrade that offers a surprising return is a strategic skylight replacement. Modern skylights do more than just let in light; they transform spaces, enhance energy efficiency, and significantly elevate both your home’s curb appeal and its overall market value, making it a truly smart investment for any discerning seller.
Elevating Curb Appeal: Beyond the Facade
Curb appeal is that crucial first impression, and it’s not just about what buyers see from the street; it’s about the overall feeling of quality and modernity your home projects. While many think of skylights only from the inside, a sleek, well-integrated modern skylight can dramatically improve your home’s exterior aesthetic. Gone are the days of bulky, intrusive skylight domes; today’s designs are flush, elegant, and complement contemporary architectural styles.
Imagine a buyer pulling up to your Coeur d’Alene home. Beyond the manicured lawn and inviting porch, a glimpse of sophisticated skylights on the roof signals a well-maintained, updated property. This subtle yet powerful visual cue suggests that care has been taken not just on the surface, but throughout the home. It hints at a brighter interior, sparking curiosity and drawing potential buyers in with a promise of modern comfort and style.
Furthermore, modern skylights come in various shapes and sizes, allowing for architectural statements that can enhance your home’s unique character. Whether it’s a strategically placed single skylight above an entryway or a series of units that create a stunning roofline feature, they add a touch of luxury and thoughtfulness that can differentiate your property in a competitive market. This attention to detail on the exterior speaks volumes about the quality within.
The Bright Side of Interior Design: Natural Light’s Power
Step inside, and the true magic of modern skylights unfolds. Natural light is one of the most coveted features for homebuyers, especially in a region like North Idaho where maximizing daylight hours is cherished. Skylights flood interior spaces with glorious, glare-free sunlight, instantly making rooms feel larger, more open, and incredibly inviting. This transforms even traditionally dark areas, like hallways, stairwells, or north-facing rooms, into vibrant, cheerful spaces.
Beyond simply brightening a room, natural light has a profound psychological effect. It boosts mood, increases perceived spaciousness, and can even make colors and textures within your home appear richer and more authentic. For buyers, walking into a home bathed in natural light feels uplifting and welcoming, creating an emotional connection that artificial lighting simply can’t replicate. It allows them to envision themselves living comfortably and happily in the space.
Moreover, skylights can highlight your home’s best features, from stunning hardwood floors to unique architectural details, without the need for additional electrical fixtures. This strategic illumination can make a significant difference in how a buyer perceives the value and appeal of each room. It’s an effortless way to showcase your property in its best possible light, quite literally, leaving a lasting positive impression.
Energy Efficiency and Modern Comfort
One of the biggest concerns buyers often have with older homes, particularly those with existing skylights, is energy efficiency. Old skylights were notorious for heat loss in winter and heat gain in summer, leading to higher utility bills. However, modern skylight technology has advanced dramatically, addressing these issues head-on and offering significant energy savings.
Today’s skylights feature advanced glazing technologies, such as low-emissivity (Low-E) coatings and argon gas fills, which provide excellent insulation. This means they effectively block harmful UV rays in the summer, preventing overheating and fading of furnishings, while retaining warmth indoors during the colder North Idaho months. The result is a more comfortable home environment year-round, with reduced reliance on your heating and air conditioning systems.
Furthermore, many modern skylights come with integrated smart features. Think about remote-controlled blinds or shades for light control, rain sensors that automatically close the skylight when it starts to sprinkle, or even solar-powered venting options that allow for passive cooling and improved air circulation. These features not only enhance comfort and convenience but also appeal to eco-conscious buyers looking for smart, energy-efficient homes, adding another layer of value to your property.
Health and Wellness Benefits: A Hidden Gem
In today’s world, buyers are increasingly focused on homes that support a healthy and comfortable lifestyle. Natural light, particularly from above, plays a crucial role in promoting well-being, and this is another area where modern skylights shine. Exposure to natural daylight helps regulate our circadian rhythm, which is our natural sleep-wake cycle. A home filled with natural light can contribute to better sleep, improved mood, and increased productivity for its occupants.
By reducing the need for artificial lighting during the day, skylights create a more natural and less fatiguing environment. This subtle benefit might not be the first thing a buyer thinks of, but the feeling of living in a bright, airy space is inherently appealing. It contributes to a sense of calm and vitality, making your home feel like a sanctuary from the outside world.
Moreover, some modern skylights offer venting capabilities, allowing fresh air to circulate throughout your home. This natural ventilation can help improve indoor air quality by expelling stale air, odors, and airborne pollutants. For buyers concerned about allergies or simply seeking a healthier living environment, this feature is a significant advantage, reinforcing the idea that your home is not just beautiful, but also good for them.
Addressing Common Buyer Concerns: Leaks and Maintenance
It’s true that older skylights sometimes had a reputation for leaks or high maintenance. However, this is one area where modern technology has made incredible strides. A new, professionally installed skylight replacement completely alleviates these historical concerns, offering buyers peace of mind and showcasing your home as one that has been thoughtfully updated.
Today’s skylights are designed with advanced flashing systems and durable, weather-resistant materials that ensure a watertight seal. Manufacturers often provide extensive warranties on both the product and the installation, giving both you, the seller, and the future homeowner confidence in its longevity and performance. High-quality glass resists impacts and wear, and the overall construction is built to withstand the elements, including the varied weather patterns we experience in North Idaho.
By investing in a modern skylight replacement, you’re not just adding a feature; you’re eliminating a potential objection. Instead of a buyer wondering if an old skylight will be a problem, they’ll see a brand-new, worry-free addition that enhances the home’s value and comfort. This proactive approach to home improvements can significantly smooth the selling process and instill trust in potential buyers.
Return on Investment (ROI): What Does It Mean for Your Sale?
Ultimately, when selling your home in Coeur d’Alene, every renovation decision boils down to its potential return on investment. While the exact ROI can vary, a modern skylight replacement is often considered a smart upgrade due to its multi-faceted benefits that appeal directly to what today’s buyers are looking for. It’s an investment that pays off in both tangible and intangible ways.
Tangibly, a home with new, energy-efficient skylights can command a higher asking price and often sells faster than comparable properties without this feature. The perceived value added by abundant natural light, improved energy efficiency, and a modern aesthetic can significantly boost your home’s appraisal value. It helps your property stand out from the competition, making it a more desirable and memorable option for prospective buyers.
Intangibly, the emotional appeal of a bright, inviting, and healthy home can lead to quicker offers and potentially even multiple offers. Buyers are willing to pay a premium for homes that feel good and require less immediate work. By proactively addressing potential issues and enhancing desirable features like natural light, you’re positioning your home as a move-in-ready dream, securing a stronger sale in the vibrant Coeur d’Alene real estate market.
Conclusion
When you’re preparing to list your North Idaho home, every upgrade you consider should be strategic, aiming to maximize appeal and value. A modern skylight replacement ticks all these boxes and more. It’s an investment that dramatically enhances curb appeal, floods your interiors with desired natural light, boosts energy efficiency, contributes to a healthier living environment, and provides peace of mind regarding maintenance.
Don’t underestimate the power of natural light and modern design in capturing the hearts and minds of potential buyers. By choosing to replace outdated skylights with contemporary, high-performance models, you’re not just making a renovation; you’re making a smart move that can elevate your property above the rest, ensuring a successful and rewarding sale in the Coeur d’Alene market. Consider this impactful upgrade – it might just be the bright idea that sells your home faster and for a better price.
Everything You Need to Know About vinyl sided sheds
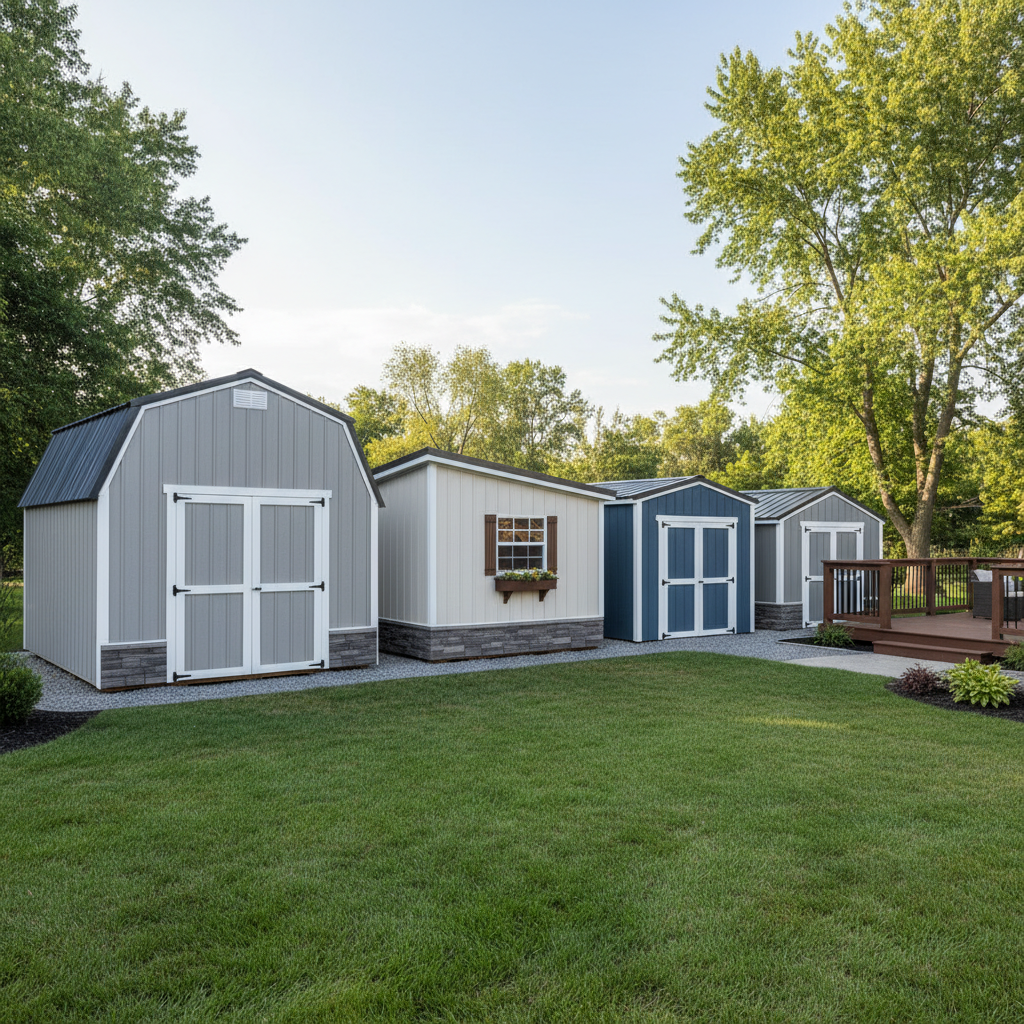
Everything You Need to Know About Vinyl Sided Sheds
For homeowners in Coeur d’Alene and throughout North Idaho, enhancing property value and functionality is always a priority. Whether you’re looking to declutter your garage, create a dedicated workspace, or simply add valuable storage, a well-chosen shed can be an excellent investment. When considering adding such a structure, understanding the various options available is key, and among the most popular choices today are durable vinyl sided sheds. These versatile units offer a compelling blend of aesthetics, low maintenance, and robust performance, making them a smart addition to almost any property.
Why Vinyl Sided Sheds? Understanding Their Appeal
The appeal of vinyl sided sheds stems from a combination of practical benefits that resonate deeply with property owners, especially in regions like North Idaho where weather can be a significant factor. Unlike traditional wood sheds that demand regular painting, staining, and treatment to withstand the elements, vinyl sheds are designed for minimal upkeep. This translates directly into more free time for you to enjoy the beautiful surroundings of Coeur d’Alene, rather than spending weekends on shed maintenance.
Furthermore, vinyl siding offers exceptional durability against the varied North Idaho climate. From heavy winter snows and spring rains to hot summer sun, vinyl is engineered to resist fading, cracking, and warping. This resilience ensures your shed maintains its attractive appearance year after year, contributing positively to your home’s curb appeal. For anyone looking for a long-lasting, hassle-free storage solution that complements their home, vinyl sided sheds present a highly attractive option.
Key Benefits of Choosing Vinyl Siding for Your Shed
When you opt for a vinyl sided shed, you’re investing in a structure that brings a host of advantages. Perhaps the most significant is its unparalleled weather resistance. Vinyl is inherently waterproof and UV-stabilized, meaning it stands up remarkably well to moisture, preventing rot, mold, and mildew that can plague other materials. This protective barrier is crucial for safeguarding your stored items, from gardening tools to seasonal decor, against the unpredictable nature of our local weather patterns.
Beyond weather protection, vinyl sheds are also a formidable defense against pests. Unlike wood, which can be an inviting target for termites, carpenter ants, and other wood-boring insects, vinyl offers no nutritional value to these unwelcome guests. This helps to maintain the structural integrity of your shed and protects its contents. Moreover, the ease of cleaning is a major bonus; a simple spray with a garden hose is usually all it takes to remove dirt, dust, or pollen, keeping your shed looking fresh and new with minimal effort.
Lastly, the aesthetic versatility of vinyl siding allows for a seamless integration with your existing home. Available in a wide array of colors and styles, you can choose a shed that perfectly matches your house’s exterior, enhancing the overall harmony and visual appeal of your property. This thoughtful design consideration can significantly boost your property’s curb appeal, a valuable asset whether you plan to stay for years or consider selling in the future.
Considering Placement and Foundation for Your Vinyl Shed
Once you’ve decided on a vinyl sided shed, the next critical steps involve careful planning of its placement and the preparation of a proper foundation. The longevity and stability of your shed depend heavily on these initial considerations. In North Idaho, where ground conditions can vary, ensuring a level and stable base is paramount. Options typically include a gravel pad, a concrete slab, or sturdy treated wood skids. Each has its advantages, but the goal remains the same: to provide a solid, well-drained surface that prevents the shed from shifting or settling unevenly over time.
Selecting the right site for your shed involves more than just finding an open spot. Consider factors like drainage – you want to avoid areas where water tends to pool. Accessibility is also important; think about how you’ll get items in and out, and if you’ll need vehicle access. Sun exposure can influence the shed’s interior temperature, which might be a factor if you plan to store sensitive items or use it as a workspace. Furthermore, it’s crucial to be aware of any local regulations, zoning laws, or Homeowners Association (HOA) guidelines in Coeur d’Alene or your specific North Idaho community that might dictate shed size, placement, or even color. A little research upfront can save a lot of headaches later.
Sizing and Customization: Making Your Shed Work for You
The beauty of modern vinyl sided sheds lies not just in their durability but also in their adaptability to your specific needs. Before choosing a shed, take a moment to assess what you truly need to store. Are you looking for a compact space for gardening tools and a lawnmower, or do you envision a larger area for ATVs, kayaks, or even a dedicated hobby workshop? Common sizes range from small 6×8 foot utility sheds to expansive 12×24 foot or larger structures, each offering different capacities and functionalities. Carefully measuring your intended items and considering future needs will help you determine the optimal footprint.
Beyond size, customization options can transform a basic shed into a highly functional extension of your home. Think about adding windows for natural light, which is particularly beneficial if you plan to spend time inside. Different door styles, such as double doors or roll-up doors, can facilitate easy access for larger equipment. Interior shelving, workbenches, and pegboards can maximize vertical storage and organization. Even small details like vents for improved air circulation or a ramp for easy access with wheeled items can make a significant difference in how effectively your shed serves its purpose. Tailoring these features ensures your vinyl sided shed truly works for you.
Installation Process: DIY vs. Professional
Once you’ve selected the perfect vinyl sided shed, the next step is getting it installed. You generally have two main avenues: embarking on a do-it-yourself (DIY) assembly or opting for professional installation. Many vinyl sheds come in kit form with detailed instructions, making DIY an appealing choice for those with a knack for construction and a desire to save on labor costs. It can be a rewarding project, offering a sense of accomplishment once completed. However, it’s important to be realistic about the time commitment, the need for specific tools, and the physical effort involved. Missteps during assembly can lead to structural issues or void warranties, so precision is key.
On the other hand, professional installation offers significant benefits, especially if your time is limited or you prefer to leave complex tasks to experts. Professional installers have the experience and specialized tools to assemble your shed quickly, correctly, and efficiently. They ensure the structure is level, secure, and built to manufacturer specifications, often backed by their own workmanship guarantees. For homeowners in Coeur d’Alene and North Idaho, choosing a local installer can also mean they’re familiar with regional building codes and weather considerations, ensuring your shed is optimally prepared for the local environment. While it involves an additional cost, the peace of mind and time saved can be invaluable.
Maintenance and Longevity: Keeping Your Vinyl Shed Pristine
One of the most compelling advantages of vinyl sided sheds is their remarkably low maintenance requirements, ensuring they remain a valuable asset to your North Idaho property for many years to come. Unlike wood, which demands regular painting, staining, and sealing to protect against rot and pests, vinyl simply needs occasional cleaning to maintain its pristine appearance. A simple wash-down with a garden hose, perhaps with a mild detergent for stubborn spots, is usually all it takes to remove dirt, dust, and pollen, keeping your shed looking as good as new.
Beyond routine cleaning, a few simple checks can further extend the lifespan of your vinyl shed. Periodically inspect the siding for any potential damage, though vinyl is highly durable, accidental impacts can occur. Ensure that doors and windows are operating smoothly and sealing properly to prevent moisture intrusion. Keeping the area around the base of the shed clear of debris and vegetation will also aid in proper drainage and prevent moisture from wicking up the siding. By following these minimal maintenance practices, your vinyl sided shed will continue to provide reliable, attractive storage and enhance your property’s functionality for decades, standing strong against the diverse elements of the Coeur d’Alene landscape.
Conclusion
In the vibrant real estate landscape of Coeur d’Alene and North Idaho, every addition to your property should be a thoughtful investment. Vinyl sided sheds stand out as an exceptionally smart choice, offering a powerful combination of durability, low maintenance, and aesthetic appeal. They provide robust protection against our local weather conditions, resist pests, and are incredibly easy to keep clean, freeing up your valuable time. From careful planning of placement and foundation to choosing the right size and customization options, a vinyl shed can be tailored to perfectly meet your storage and functional needs.
Whether you opt for a DIY assembly or professional installation, the end result is a valuable, long-lasting structure that enhances your property’s utility and curb appeal. By understanding the benefits and considerations of vinyl sided sheds, you’re well-equipped to make an informed decision that will serve you well for years to come, truly adding to the charm and efficiency of your North Idaho home.
What Homebuyers Need to Know About Roof Health Before Making an Offer
Introduction: The Overlooked Guardian of Your Future Home
When you’re falling in love with a potential new home, it’s easy to be captivated by the granite countertops or the perfect backyard. But floating above it all is one of the most important—and expensive—components of the house: the roof. A healthy roof protects everything underneath it, while a failing one can lead to a cascade of costly problems that no new homeowner wants to face. Getting a professional opinion on potential roof repair Toronto can save you from future headaches and unexpected bills.
Think of the roof as the home’s first line of defense against the elements. Its condition can tell you a lot about how well the property has been maintained and what expenses you might be facing down the road. This guide will walk you through the key aspects of roof health, empowering you to look at a property with a more critical eye and make an offer with confidence. Let’s get you prepared to look up! 🏡
The Age of the Roof: A Ticking Clock? 🕰️
One of the first questions you should ask about a property is, “How old is the roof?” Every roofing material has an expected lifespan. For instance, standard asphalt shingles typically last 20-25 years, while more durable materials like metal or slate can protect a home for 50 years or even longer. Knowing the installation date gives you an immediate baseline for its remaining life.
An older roof isn’t an automatic deal-breaker, but it is a major financial consideration. If a 25-year-old asphalt shingle roof is nearing the end of its life, you should anticipate the cost of a full replacement in your budget. This knowledge is crucial because a new roof is a serious expense, and it’s better to plan for it than be surprised by it a year after moving in.
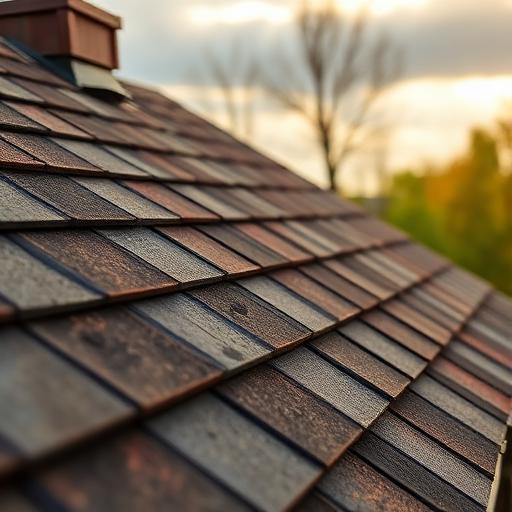
Spotting Trouble from the Ground: A Visual Check-Up
You don’t need to be a roofer to spot some obvious warning signs from the safety of the ground. Take a walk around the property and look up. Are the shingles curling at the edges, cracked, or are entire pieces missing? Pay attention to areas around chimneys, vents, and skylights, as these are common spots for issues to develop.
Another thing to look for are dark streaks or patches of moss and algae. While sometimes a cosmetic issue, these can indicate trapped moisture, which can degrade the shingles over time. Also, check if the roofline appears straight or if it sags in the middle. Any visible sagging is a major red flag that could point to structural problems. This quick visual scan helps you identify potential issues to bring up with an inspector.
Understanding Roofing Materials: Not All Shingles Are Created Equal
The type of material used on a roof directly impacts its durability, maintenance needs, and replacement cost. Asphalt shingles are the most common in North America due to their affordability, but they have a shorter lifespan. Metal roofs, on the other hand, are incredibly resilient and energy-efficient but come with a higher upfront cost.
When viewing a home, identify the roofing material. Is it clay tile, slate, wood shake, or something else? Each has its own set of potential problems and repair methods. Knowing the material helps you understand what future maintenance might look like and allows you to ask more pointed questions about its history and upkeep. It also gives you a better idea of what a future replacement could cost.
Leaks, Water Damage, and the Attic Clues 🕵️
The best place to find evidence of a roof problem isn’t always on the outside; sometimes, the attic tells the real story. If you can, safely pop your head into the attic space and look around. Your nose might be the first to detect a problem—a musty or damp smell is a clear sign of moisture issues.
With a flashlight, scan the underside of the roof decking. Do you see any dark water stains, active drips, or signs of rot? Check the insulation for damp or compressed spots. You should also look for any pinpricks of daylight coming through the roof, as this means there’s a hole that water can easily get through. What seems like a tiny issue in the attic can be a symptom of a much larger failure on the roof’s surface.
The Power of a Professional Roof Inspection
While your own visual check is helpful, it can never replace a professional assessment. A general home inspector will give the roof a look, but they may not climb onto it or have the specialized eye of a dedicated roofing contractor. Hiring a professional roofer to conduct a separate inspection is a wise investment that can save you thousands.
A roofing expert will provide a detailed report on the roof’s current condition, its life expectancy, and any necessary repairs or potential replacements. This document is invaluable. It gives you a clear, unbiased picture of the situation and removes any guesswork. With this expert report in hand, you have concrete information to base your next steps on.
Using Roof Condition in Your Offer and Negotiations
So, the inspection reveals the roof needs work. What now? This information is a powerful tool in your negotiation process. You can use the inspector’s report and repair estimates to ask the seller for concessions. This could mean requesting they fix the roof before closing, or you could negotiate a lower sale price to cover the future cost yourself.
A problematic roof doesn’t mean you have to walk away from your dream home. It just means you need to be practical. By understanding the true condition of the roof, you can adjust your offer to reflect the home’s actual value, including the necessary improvements. This protects you from overpaying and ensures you’re stepping into your new home with your eyes wide open and a solid plan in place. ✨
